
Automated checks This plan went on the timetable after its content and sources passed the studio's automated checks on Saturday 31 October 2026. Before you start
Running order
Set 1 of 6
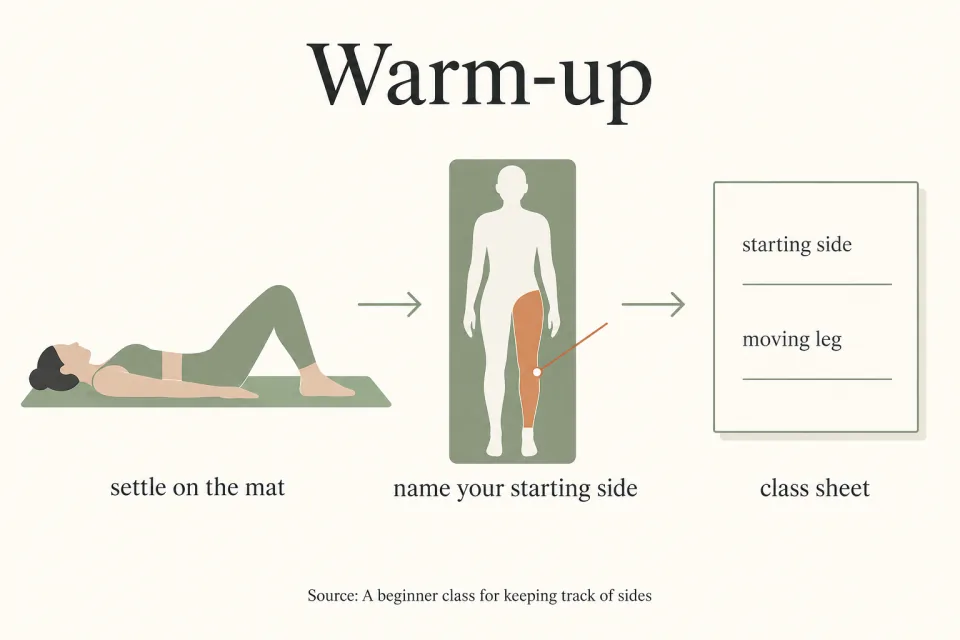
Warm-up: settle on the mat and name your starting side
- 01
- This class focuses on keeping your side counts clear through changes of movement and position. Use the accompanying class-sheet instructions as an editorial practice example assembled from the exercises below.
- 02
- Lie on your back with your knees bent, your feet resting on the mat and your head down. Begin by attending to your breathing, leaving the movement count aside while you settle into this starting position.
- 03
- Prepare your class sheet before beginning the moving sequence. Give each exercise space for its starting position, moving limb, variation, counting unit, planned repetitions, completed repetitions and next transition.
- 04
- Write left and right from your own body's perspective. Keep those labels throughout the class, including when you turn to face away from the screen or change which side rests on the mat.
- 05
- Check how a facing instructor is demonstrating before following a side cue. In Pearson's teaching example, the instructor moves left while the participants move right, demonstrating the action as their mirror image.
- 06
- Use that example to distinguish the instructor's movement from your instruction. If the spoken cue names your right leg, label the entry right leg rather than copying the apparent side of the image.
- 07
- Check that you can see the demonstration from your exercise position. The American Council on Exercise recommends greater reliance on verbal cues when participants have difficulty watching a demonstration while moving.
- 08
- Give yourself a separate moment to establish the starting position before attending to the movement's breathing cue. Pilates Association Australia's teaching examples distinguish these instructions, so the sheet can keep position and breathing in separate spaces too.
- 09
- Follow Pilates Association Australia's recommendation to keep feedback simple and address one item at a time. During this preparation, use that item to establish which limb the next instruction names.
- 10
- Keep the sheet within your class materials and make entries during a pause in movement. Leave a blank where the source supplies no repetition target, and label any completed count as a record of what you did.
- 11
- Use the first exercise entry to practise this distinction between a plan and a record. The planned space holds the supplied instruction; the completed space holds only the movements you can account for.
Set 2 of 6
Arm pumps: separate the movement count from the breath
- 12
- Begin The Hundred in its simpler variation, with your head and feet resting on the mat and your knees bent. Write this position in the variation space before starting the arm movement.
- 13
- Use arm pumps as the counting unit for this exercise. The Hundred is named for its 100 arm pumps, so record the arm action separately from any change in leg position.
- 14
- Coordinate the pumping with five short inhalations followed by five short exhalations, as described by Verywell Fit. Keep the breathing instruction alongside the movement entry rather than using the breath words as labels for left and right.
- 15
- Attend to the breathing pattern as you move your arms. Healthline identifies holding the breath as a common beginner mistake, so make breathing part of the movement cue you follow rather than an instruction to revisit after the set.
- 16
- Keep the feet-down variation written as a shared entry. With this setup, the sheet needs a record of the arm pumps and the chosen position, without a separate repetition total for each resting foot.
- 17
- Read the alternative leg setup before choosing whether to use it. Verywell Fit also describes a variation with a leg in tabletop and the other foot down, changing legs halfway through the exercise.
- 18
- If you choose that variation, write the starting leg and the halfway change in the transition space. Continue recording the arm pumps under the same exercise entry when the raised leg changes.
- 19
- Treat a change of variation as a separate detail on the sheet. For example, if you begin with a raised leg and later put that foot down, record the change of position alongside the movement already completed.
- 20
- If the instructor pauses speaking while you continue pumping, record the movement that continued during the silence. In this class-sheet example, a pause in speech does not mark the end of your physical set.
- 21
- If you stop moving, mark the last completed count you remember before attending to the screen or sheet. Add the current leg position to that mark so the next instruction identifies both the movement and its setup.
- 22
- When you cannot recall the completed amount, write that the count is uncertain. Keep the uncertainty attached to this entry instead of filling the space with a guessed total.
Set 3 of 6
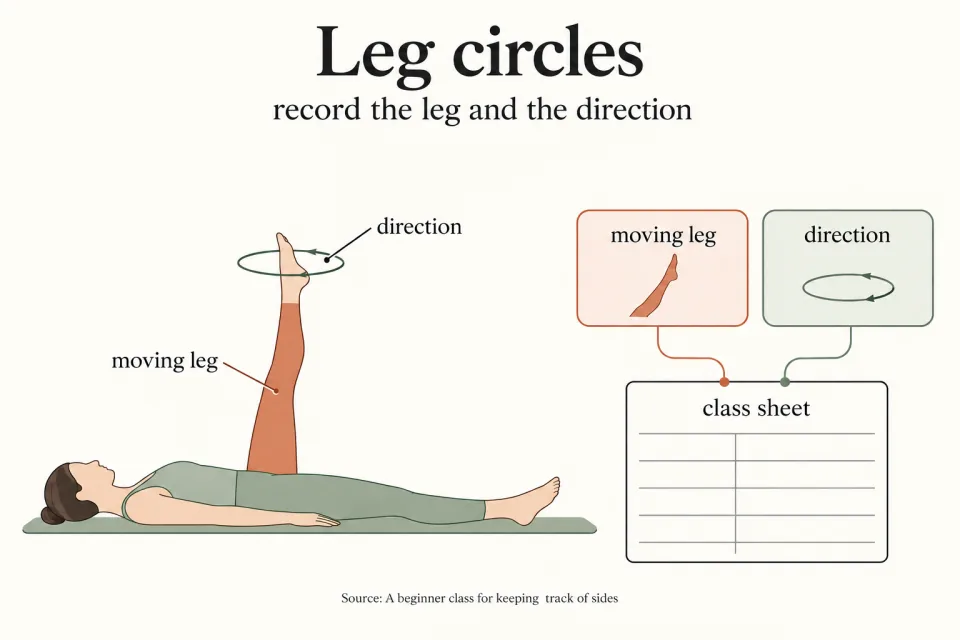
Leg circles: record the leg and the direction
- 23
- Prepare for Single Leg Circles by writing the moving leg and circle direction together. For this class example, begin with the right leg and reserve separate spaces for its starting direction and its reverse direction.
- 24
- Choose the supporting-leg position before starting the circles. Verywell Fit describes a modification with the supporting knee bent and its foot on the floor, and also permits a slight bend in the moving knee.
- 25
- Record the knee position as part of the variation. If you use a bent supporting knee, carry that detail into the entry for the other leg instead of leaving the word circles to stand for the entire setup.
- 26
- Follow Amanda Turner's sequence of five circles in the starting direction and five in reverse before changing legs. Keep the direction labels attached to the right-leg entry throughout this part of the set.
- 27
- Let the size of the circle follow the alignment and steadiness you can maintain. Turner uses alignment and steadiness to guide the circle's size, so attend to the shape of the exercise as well as the count.
- 28
- Mark the completed starting-direction entry before beginning the reverse circles. A direction change belongs in a different space from a leg change, even though the exercise name remains the same.
- 29
- For a worked sheet entry, write right leg, starting direction, five completed after finishing that block. This records the count given by Turner without implying that the reverse direction is already complete.
- 30
- After the reverse block, write right leg, reverse direction, five completed. Leave the left-leg spaces open until you have changed legs and performed their movements.
- 31
- Use Turner's beginning-to-intermediate transition to change legs. Bring the working knee inward, lower that leg, then bring the other knee inward and extend that leg into its starting position.
- 32
- Repeat five circles in each direction with the other leg, following Turner's sequence. Keep the same direction labels you used for the starting leg so the sheet records matching parts of the exercise.
- 33
- If a pause occurs between directions, mark the completed direction and name the next direction in the transition space. On returning, read that transition before moving, rather than treating the exercise name alone as the restart instruction.
- 34
- If a pause occurs during a direction, retain the completed movements you remember within that entry. Record an uncertain count when needed, while keeping the known leg, knee position and direction available for the next cue.
Set 4 of 6
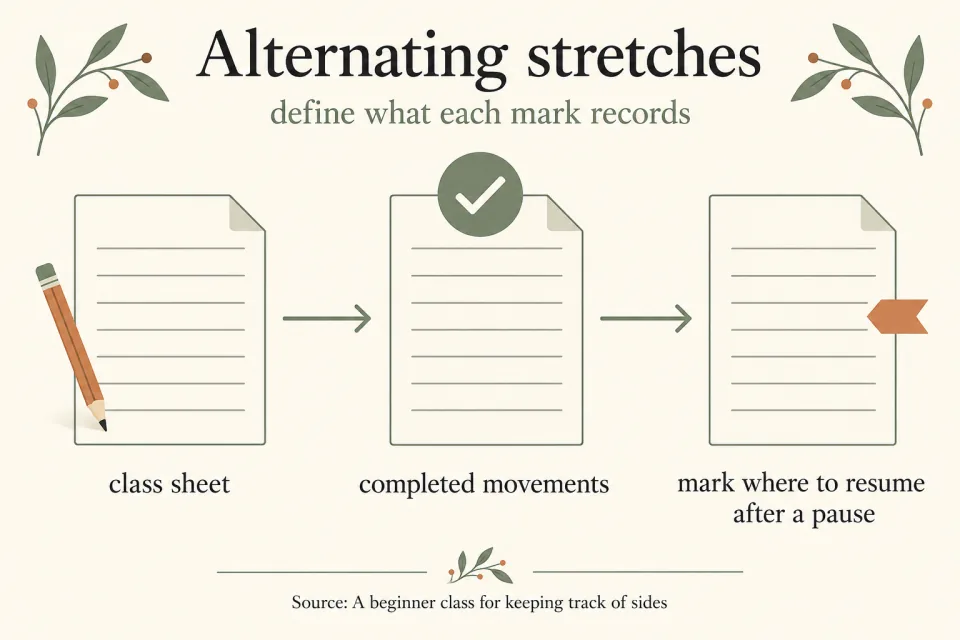
Alternating stretches: define what each mark records
- 35
- Use Single Leg Stretch to practise recording an alternating movement. Switch the leg and arm positions while keeping the torso steady, following the movement described in Verywell Fit's traditional mat guide.
- 36
- Choose the counting label before beginning. For this class sheet, use individual leg movements and keep a separate completed record for left and right.
- 37
- Say the moving side as you change positions, then place the completed mark under that side when you pause to record. Keep the leg label consistent even though the hands also change position during the exercise.
- 38
- If the instruction you are following counts complete left-right pairs, write pairs in the counting-unit space instead. Keep that label throughout the entry so a completed pair and a completed individual leg movement do not share an unexplained tally.
- 39
- When using the pair convention, leave a pair unfinished until its matching side has moved. If you pause midway, name the side already completed and the side due next in the transition space.
- 40
- Read the transition as an instruction to move the named leg. This gives the next action a specific starting point without requiring you to repeat the whole alternating sequence from memory.
- 41
- Pause the movement if you need to change how the sheet records it. Start a fresh entry with the new counting label and keep the earlier record under its original label.
- 42
- Move to Double Leg Stretch as a separate exercise entry. Reach the arms and legs away from the body and bring them back together, as described in Verywell Fit's traditional mat sequence.
- 43
- For this sheet, mark the completed return of that shared movement. Use a shared record rather than assigning the simultaneous action to the left column and then the right column.
- 44
- Keep the names of these stretches visible beside their counting units. Single Leg Stretch uses switching positions in this example, while Double Leg Stretch uses the arms and legs reaching and returning together.
- 45
- Finish the entry by naming the next position change: turning onto your side for Side Kicks. Close the stretch record before beginning the side-lying record, even if the instructor continues speaking through the transition.
Set 5 of 6
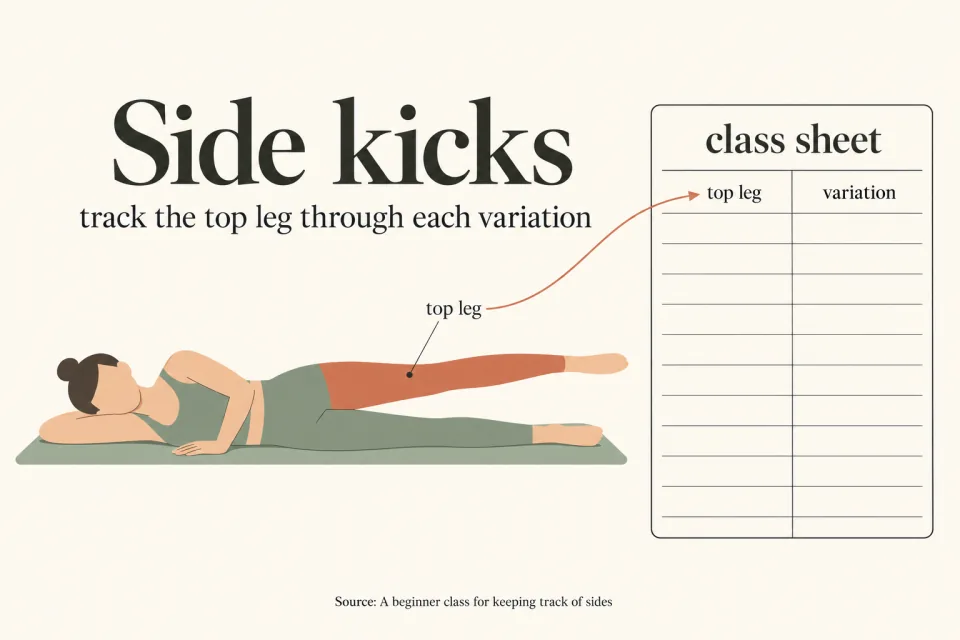
Side kicks: track the top leg through each variation
- 46
- Set up Side Kicks with the bottom knee bent behind you and the top leg lifted to hip height, following The Pilates Barn's side-leg instructions. Write both the supporting side and the moving leg on the sheet.
- 47
- For the worked example, lie on your left side and label the moving leg right. Keep right as the heading for the movement record, with left side down written in the starting-position space.
- 48
- Hold the upper body still while the leg moves. The Pilates Barn's instructions keep the torso from rocking backward and forward during this side-leg work.
- 49
- Keep the ribs supported throughout the repetitions. Verywell Fit's Side Kick instructions retain that support rather than letting the ribs sink toward the mat as the movement continues.
- 50
- Give each variation its own entry under the moving leg. The Pilates Barn includes circles in each direction, up-and-down pulses, forward-and-back bicycling and forward-and-back sliding within its side-leg work.
- 51
- Begin the circle entry by naming its direction. When you reverse the circle, change the direction label while keeping the moving-leg label in place.
- 52
- Record pulses under their own movement name when you change to that variation. Keep the completed circle record intact, and use the transition space to show that the leg now moves up and down.
- 53
- Name bicycling separately from sliding when following those variations. Write forward or back alongside the movement name so the sheet records what the leg was doing at the point you paused.
- 54
- If you interrupt the set after changing variations, mark the current variation before looking back at the earlier entries. For example, a completed circle entry can remain complete while the sliding entry remains open.
- 55
- Turn to the other side when you reach the side change. The Pilates Barn explicitly directs the practitioner to repeat the side-leg work on the other side.
- 56
- Rewrite the starting position after turning: right side down, left leg moving. Carry the variation names into the left-leg record and follow the same sequence of movement entries.
- 57
- Check the variation names when closing the side-work set. A circle total and a pulse total belong beside their own movements, so retain that detail even if the overall amounts happen to match.
- 58
- Record any setup change alongside the side on which you used it. The finished sheet should show the position and movements you performed, including a variation that differed between sides.
Set 6 of 6
Seated movements and the standing close
- 59
- Begin Saw by keeping the hips anchored and level as the upper body turns. Use Verywell Fit's alignment cue as the focus for this seated part of the class.
- 60
- Label the direction of the upper-body turn in the sheet's movement space. Keep the seated starting position in its own space, since the direction of the turn now identifies the side being recorded.
- 61
- Return from the turn before marking it complete under the convention used for this class sheet. If you are following another counting instruction, write that instruction beside the entry before continuing.
- 62
- Read the next direction from the transition space after an interruption. Keep the completed turn attached to its own side, and leave the next direction open until you perform it.
- 63
- Move into Mermaid as a new exercise entry. Bend directly sideways while keeping the hip on the stretching side down, following Verywell Fit's description.
- 64
- Write the bending direction beside the movement name. Use the starting-position space for the seated setup instead of asking a left or right label to describe both the setup and the bend.
- 65
- Keep the sideways direction as your movement cue through the bend. When you change direction, update that part of the record while retaining any setup details that still apply.
- 66
- Finish the moving sequence with Wall Roll Down. Verywell Fit places this exercise at the end of its beginner routine as the transition out of the session.
- 67
- Use the exercise demonstration to follow the roll down and return. On your sheet, close the seated entries and give this standing movement its own shared entry rather than carrying forward the alternating-side columns.
- 68
- Review the completed sheet after the movement has finished. Healthline suggests keeping an exercise journal; this class example uses that record to retain the moving side, variation and completion point.
- 69
- Read across each exercise entry from position to next transition. Keep any uncertain count marked as uncertain, and retain the known movement details beside it for the next time you use the class plan.
Reading list
- Is there a ‘right’ way to cue?
- Cueing in a Virtual Setting
- The Traditional Order of Pilates Mat Exercises
- Pilates for Beginners: A Workout and Complete Guide
- 12 Pilates Exercises to Work Your Core
- How to Do the Pilates Hundred
- DIGGING DEEPER – Get to Know Your Pilates Exercises: Single Leg Circles
- Moves For You
- Supplementary Delivery Guide: Unit C2, Exercise and Fitness Skills Development
From the studio's plan file
- Plan credited to
- UniPilates, with no writer named
- What backs it
- 9 sources in the reading list