
Automated checks This plan went on the timetable after its content and sources passed the studio's automated checks on Tuesday 3 November 2026. Before you start
Running order
Set 1 of 5
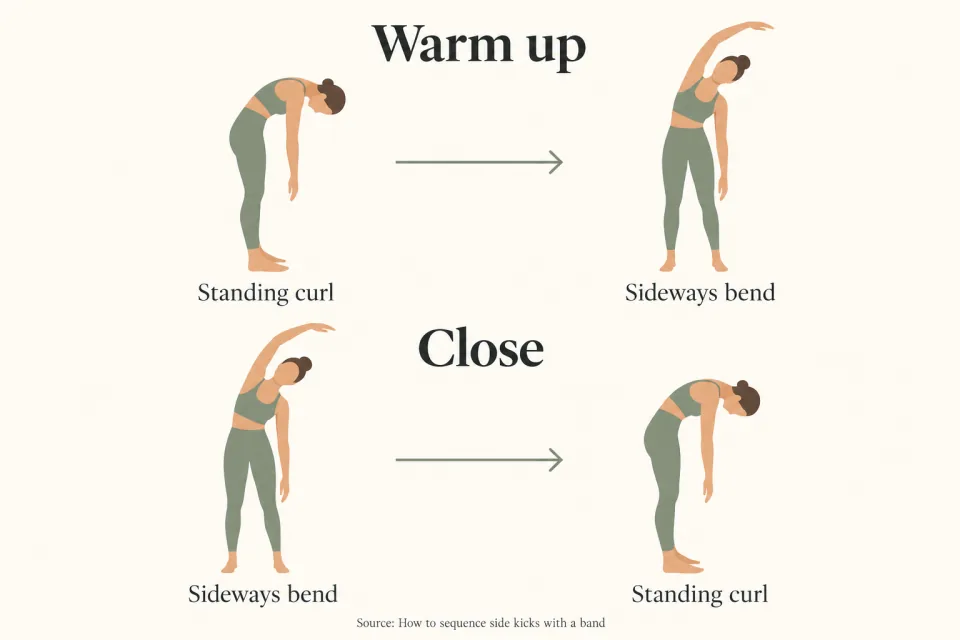
Warm up with a standing curl and a sideways bend
- 01
- This class rehearses Side Kick Front/Back without resistance, adds an ankle loop for Circles, and closes with Wall Roll Down. The arrangement is an editorial class plan assembled from the sourced exercises, with attention to keeping the torso still when the leg changes direction.
- 02
- Begin with Wall Roll Down against a wall, leaving the band aside. Settle into the standing position before beginning the curl, with your back against the wall and your arms resting beside you.
- 03
- Place your feet six to ten inches forward of the wall. Keep your back in contact with the wall while you arrange your feet, so the starting position is established before your head begins to move.
- 04
- Draw your abdominals inward and let your shoulders lower. Keep your ribs down as you prepare, without adding a separate forward bend to the upper body.
- 05
- Inhale in the starting position. Let this breath belong to the preparation, with your head still upright and your back resting against the wall.
- 06
- Exhale, nod your head and begin curling away from the wall. Let the curl travel gradually down the spine, rather than moving your head and torso forward together as a rigid shape.
- 07
- Finish the downward movement while your hips remain against the wall. Use that contact to mark the end of this curl, even when the movement is small; a slight bend in the knees is an available variation.
- 08
- Inhale at the bottom of the curl. Then exhale and begin the return with the lower abdominals, gradually bringing the spine back against the wall until you are upright.
- 09
- Move to the mat for Mermaid, keeping the band aside. Establish your seated position and keep the hip on the side being stretched down as you begin the sideways bend.
- 10
- Bend directly to the side. Picture the movement fitting between parallel panes of glass, with your torso travelling sideways rather than turning toward the floor or opening toward the ceiling.
- 11
- Return from the bend and arrange Mermaid toward the other side. Keep the same sideways path and the same attention to the hip staying down, then finish seated before moving into the side-lying rehearsal.
Set 2 of 5
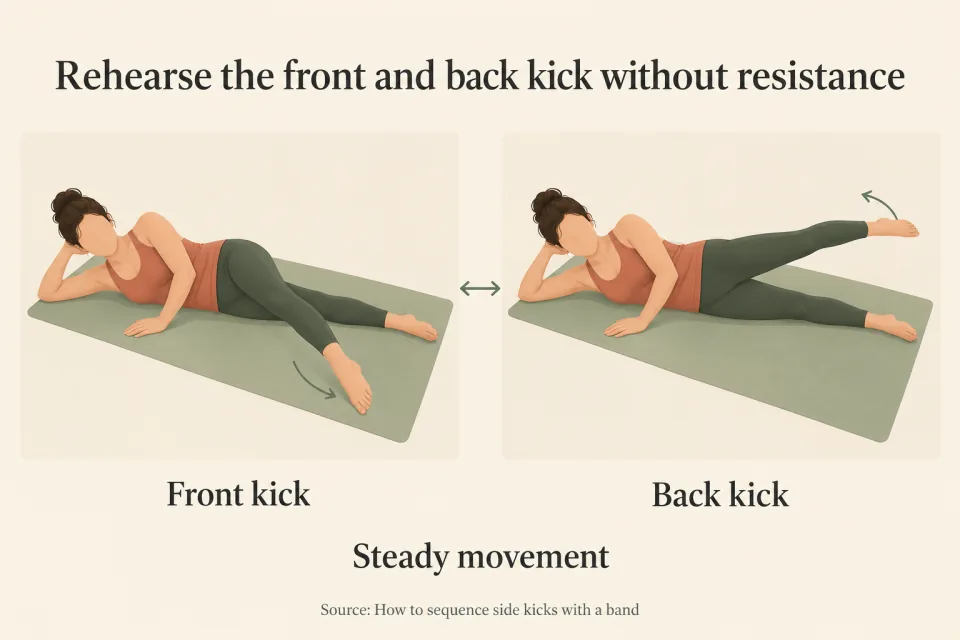
Rehearse the front and back kick without resistance
- 12
- Practise Side Kick Front/Back without the band, using the leg's forward and backward travel to rehearse a steady pelvis. Keep the loop aside throughout this set; the band portion of this plan belongs to Circles.
- 13
- Lie on your side and raise the upper leg to hip height. Arrange the position before sending the leg forward, keeping the upper leg separate from the underneath leg rather than starting the kick from the mat.
- 14
- Keep the upper knee straight with a little softness at the joint. Carry that shape through the movement, so the forward kick and backward sweep remain movements of the leg rather than repeated bending and straightening of the knee.
- 15
- Keep the underside of the rib cage supported. As the upper leg begins to move, maintain that arrangement instead of letting the ribs settle progressively closer to the mat.
- 16
- Flex the upper foot as the leg travels forward. Let the foot position belong to the forward part of Side Kick Front/Back, while the pelvis remains in its side-lying position.
- 17
- At the front, make two pulses with a double exhalation. Keep the pulses within the movement of the leg, with the torso remaining in place throughout the breath.
- 18
- Point the foot as the leg sweeps backward, and inhale through that sweep. Keep the movement continuous enough to connect the front and back portions without throwing the leg behind you.
- 19
- Keep the ribs from pushing forward as the leg travels back. For example, if the backward sweep starts to include a forward movement of the chest, bring the leg through a smaller arc while keeping the chest in place.
- 20
- Let the pelvis remain still at the change of direction. The next forward movement begins with the leg returning through its path, without a roll of the hips to start it.
- 21
- Use a slower pace or a smaller movement when rehearsing the transition. You can also finish the rehearsal earlier, keeping the same foot changes and breathing pattern within the amount of movement you choose.
- 22
- Inspired Academy gives eight to ten front/back repetitions in each direction on each side. Use that as the source's repetition range, with its option to reduce repetitions for an easier version.
- 23
- Arrange yourself on the other side and repeat the unresisted rehearsal. Establish the lifted leg and supported ribs again before beginning, rather than carrying straight into the kick while still adjusting your position.
Set 3 of 5
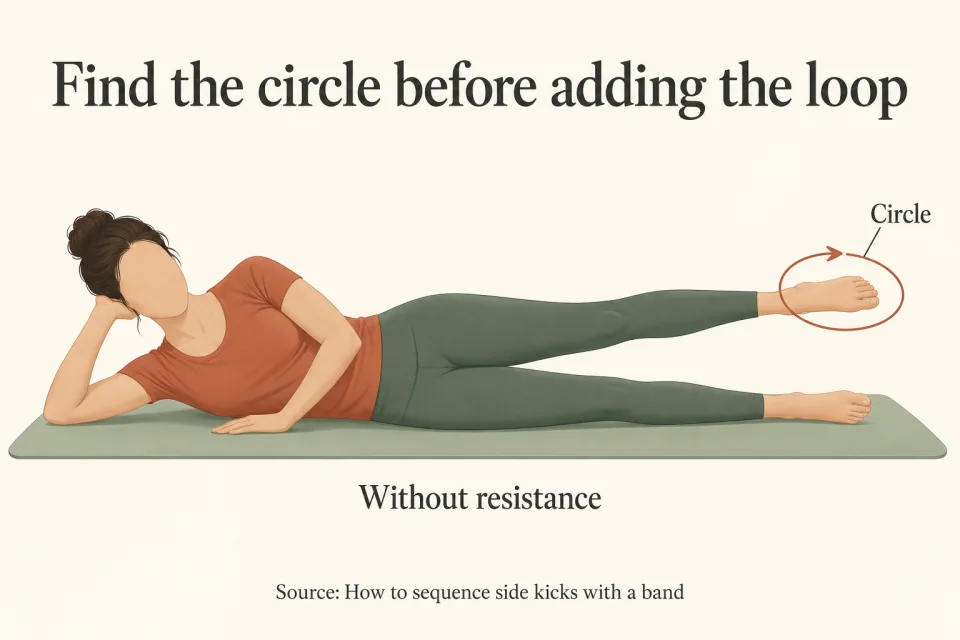
Find the circle before adding the loop
- 24
- Rehearse Circles without resistance before adding the ankle loop. Begin side-lying with your extended legs placed slightly forward of your torso, establishing the position from which the upper leg will trace its circle.
- 25
- Keep the torso and pelvis still as the upper leg begins to move. Choose a small circle whose outline you can repeat, with the movement staying at the leg instead of spreading into a roll of the whole body.
- 26
- Exhale as the leg moves through the forward and downward part of the circle. Allow that breath to follow the curved path, rather than making a forward kick and then a separate drop toward the underneath leg.
- 27
- Inhale through the backward and upward part. Connect the returning arc to the start of the next circle, keeping the movement rounded instead of changing it into a lift followed by a straight line forward.
- 28
- Guide the descending leg with the same attention you give the rising leg. The downward section is part of the exercise, so continue moving through it deliberately rather than simply letting the leg fall.
- 29
- Trace the same perimeter as the circle continues. For example, keep the forward edge in the same place instead of letting each new circle reach farther forward and gradually change the shape of the exercise.
- 30
- Keep the circle small when you reach its rear edge. Let the leg move behind its starting position without taking the pelvis along with it, then carry the leg upward to complete the curve.
- 31
- For an alternative setup, bend the underneath leg while rehearsing the unresisted circle. Arrange that leg before restarting the upper leg, keeping the movement of the circle separate from the adjustment underneath you.
- 32
- Use a rolled hand towel beneath the underneath waist if you choose that setup. Settle the towel before continuing, leaving space at the waist while the upper leg follows its small perimeter.
- 33
- Inspired Academy gives four to five circles in each direction on each side. Rehearse the reverse direction as well, keeping the circle continuous and the torso still rather than increasing its size because the direction has changed.
- 34
- Change sides for the same unresisted rehearsal. Find the slightly forward starting position again, then establish the circle's outline before moving on to the band set.
Set 4 of 5
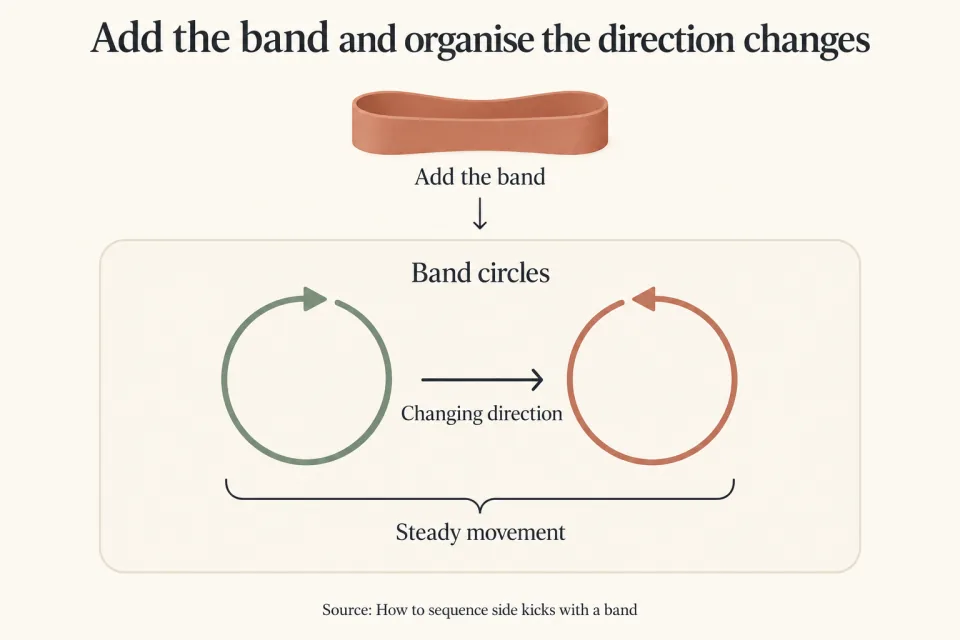
Add the band and organise the direction changes
- 35
- Use an ankle loop for the band version of Circles, keeping the circle small and the torso still. This is the resisted movement in the class plan, following the separate unresisted rehearsal of Side Kick Front/Back.
- 36
- Arrange the loop around your ankles before beginning the circles. Return to the side-lying setup with the legs slightly forward of the torso, and finish arranging your position before the upper leg starts its path.
- 37
- Begin with the familiar forward and downward arc. Keep your attention on the curve you rehearsed, rather than making a larger circle simply because the loop is now around the ankles.
- 38
- Exhale through that forward and downward movement. Let the breath accompany the leg as it rounds the lower part of the circle, keeping the torso in place instead of using a body movement to complete the arc.
- 39
- Continue guiding the leg as it descends. With the loop in place, maintain deliberate movement through the return as well as the outward travel, rather than allowing the leg to drop toward the underneath ankle.
- 40
- Inhale through the backward and upward arc. Carry the leg around to its starting position with the same small outline, so the end of the circle meets the beginning without a separate swing.
- 41
- Keep the pelvis still as the leg passes behind its starting point. If that part of the circle starts to include a roll of the hips, redraw a smaller perimeter and carry the leg through that reduced shape.
- 42
- Keep the ribs supported while the upper leg completes the return. Check the position of the torso at the rear of the circle as well as at the front, since the instruction to remain still applies around the whole path.
- 43
- Use Inspired Academy's range of four to five circles in each direction on each side for this short band set. Finish the current circle before preparing to reverse, so the change of direction has a clear starting position.
- 44
- For this plan, use an editorial reset cue: finish the circle where it began, let the upper leg settle, and arrange the side-lying position again before restarting in reverse. This reset is a teaching choice for the class, rather than a pause directed by the source.
- 45
- Begin the reverse circle from that settled position. Let the leg draw the same outline in the opposite direction, with the pelvis remaining still as the leg leaves the starting point.
- 46
- Keep breathing normally through the reverse circles. For this portion, use UCLA's instruction to continue breathing during resistance exercise, without assigning a new counted breathing pattern to the reversed movement.
- 47
- Guide the reverse circle through its lower edge. Even though the direction has changed, the descending leg still moves deliberately, and the returning arc still connects to the rest of the circle.
- 48
- Finish the reverse circle before changing sides. Use the same editorial reset to separate the end of the exercise from the change in position, then arrange the loop and legs on the other side before restarting.
- 49
- Re-establish the small perimeter on this side rather than beginning with the widest movement available. Keep the torso and pelvis still while the leg travels forward and down, then back and up.
- 50
- Complete the direction change using the same settled restart. Let the reverse circle follow the outline you have just established, then finish the band work and remove the loop before the closing set.
Set 5 of 5
Close with a sideways bend and a standing curl
- 51
- Close with unresisted Mermaid followed by Wall Roll Down. Put the loop aside before beginning, so the closing movements have their own starting positions and are separate from the side-lying band work.
- 52
- Settle into Mermaid and begin a direct sideways bend. Keep the hip on the stretching side down while the torso moves to the side, using the same clear direction as in the warm-up.
- 53
- Keep the bend within the imagined panes of glass. If the movement has started to turn forward, bring the torso back to a sideways path rather than continuing the bend along that new diagonal.
- 54
- Return from Mermaid before changing sides. Arrange the next bend from the seated position, then move sideways with the hip staying down and finish by returning from the bend.
- 55
- Stand against the wall for Wall Roll Down, using the starting position established in the warm-up. Allow time to arrange the feet and back before beginning the curl, with the arms resting beside the body.
- 56
- Draw the abdominals inward and lower the shoulders. Keep the ribs down while you prepare, making these adjustments in the standing position rather than trying to arrange them during the downward movement.
- 57
- Inhale before the curl begins. Then exhale as the head nods and the spine gradually peels away from the wall, allowing the movement to progress down the back.
- 58
- Finish the curl before the hips move away from the wall. Let the hips remain in contact as the upper body hangs forward, with a slight bend in the knees available for this version.
- 59
- Inhale at the bottom without beginning the return yet. Keep the preparation for coming upward separate from the upward movement itself, just as the side-lying reset separated the circle from its reversal.
- 60
- Exhale and begin returning with the lower abdominals. Bring the spine back against the wall gradually, following the uncurling movement upward until you finish standing.
Reading list
From the studio's plan file
- Plan credited to
- UniPilates, with no writer named
- What backs it
- 5 sources in the reading list