
Automated checks This plan went on the timetable after its content and sources passed the studio's automated checks on Sunday 8 November 2026. Before you start
Running order
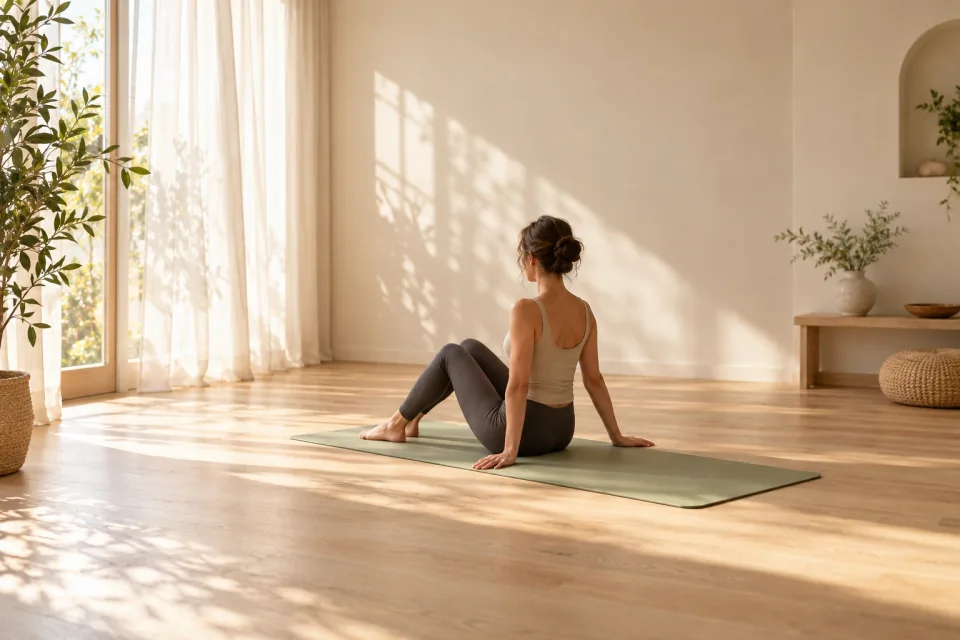
Set 1 of 6
Warm up with a seated return
- 01
- Focus this class on the movement between exercises, giving the next starting position as much attention as the exercise itself. Use selected classical links as separate rehearsals, with a seated preparation to begin and a controlled return to the mat to close.
- 02
- Sit with your knees bent and feet grounded for the half-roll-back preparation. Reach your arms forward at shoulder height, leaving them in that position as you establish the seated start.
- 03
- Exhale as you move slowly backward. Keep this preparation separate from a full descent to the mat; the movement you are practising here is the backward part of the seated exercise.
- 04
- Inhale as you return to sitting. Arrive in the same seated position you began with, so the return has a clear finish before you start anything else.
- 05
- Rehearse that finish with your arms still reaching forward. Notice whether you have already started moving your hands toward another position before the seated return is complete, and let the finish come before that change.
- 06
- Take an intentional rest whenever you want to pause the rehearsal. Clare Dunphy Hemani allows deliberate rest within her discussion of continuous movement between exercises.
- 07
- Choose the next starting position before leaving the seated preparation. For the opening lying work, picture your back on the mat and your legs ready for the tabletop variation, then make your way into that setup without adding another seated exercise.
- 08
- Separate an adjustment you need from a movement you make automatically. Hemani describes fidgeting and unnecessary clothing adjustments as extra movement between exercises; use that distinction when deciding what belongs in your own change of position.
- 09
- Practise the upcoming links as small groups, leaving a pause at the arrival position while you learn them. The article Principles of Pilates: Flowing Movement recommends connecting small groups of exercises before working toward flow through a whole session.
- 10
- Keep the rehearsal focused on arriving. For now, reaching the next starting position is the end of the task, so you can examine it before adding the movement that follows.
Set 2 of 6
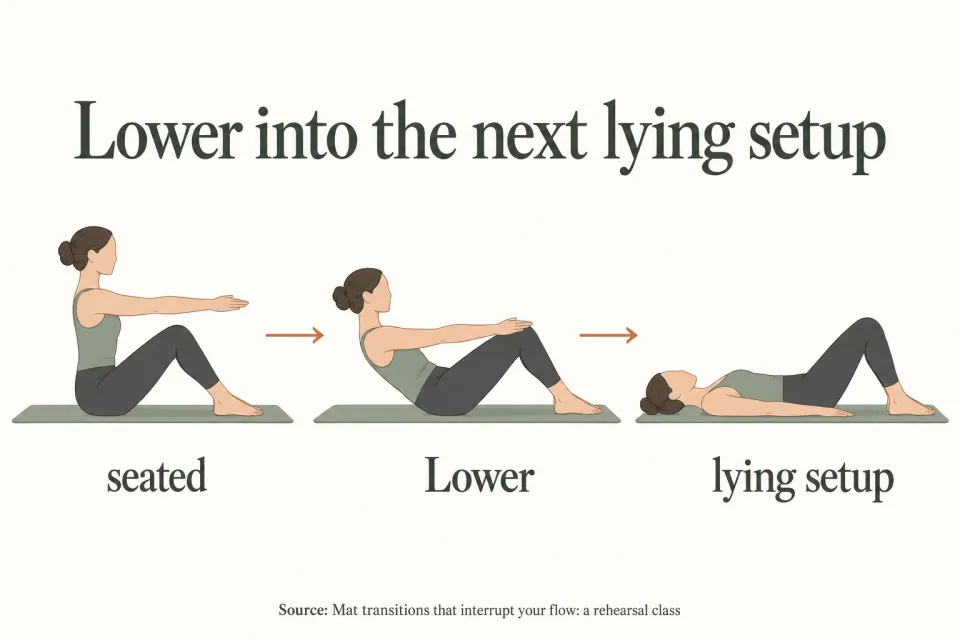
Lower into the next lying setup
- 11
- Begin the Hundred preparation lying on your back, bringing each leg into tabletop separately. Let the leg placement be complete before adding the upper-body lift.
- 12
- Lift your head and shoulder blades for the university guide's variation. Keep your torso and legs steady as you establish the position from which the arm movement will begin.
- 13
- Pump your arms beside your body. Keep the action in the arms while the shape you have already arranged stays steady, rather than repeatedly resetting the legs during the pumping.
- 14
- For the Hundred, inhale for five counts and exhale for five counts, continuing for ten cycles. Follow the breath pattern while maintaining the arm movement.
- 15
- Finish the Hundred by lowering your head and legs to the mat. Let this lowering be the transition itself, with your attention on the position you are reaching rather than on starting the next curl immediately.
- 16
- Take your arms overhead for the Roll Up. This is the next change in the advanced manual's transition, so leave it distinct from the lowering action while rehearsing the link.
- 17
- Remain lying with straight legs and relaxed shoulders. Give yourself time to check this starting position with your breath before moving upward; reaching the setup does not require beginning the exercise at once.
- 18
- Rehearse the arm placement without sitting up to rearrange yourself. In this particular link, the destination is another position on your back, so a seated detour would add a change that the described transition does not use.
- 19
- Inhale to begin the upward curl of the Roll Up. Keep this breath with the beginning of the movement, rather than using the transition to hurry past the starting position.
- 20
- Exhale as you continue forward. Let the forward part follow the beginning of the curl, keeping the breath and movement connected through the exercise you have now entered.
- 21
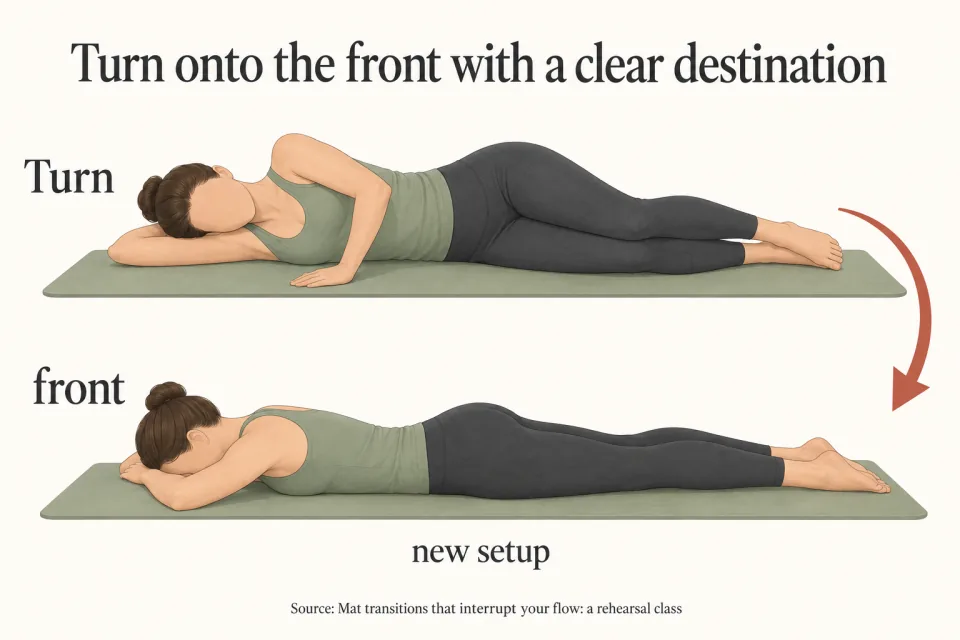
- Use bent knees and your hands behind them for the supported Roll Up variation if that is the version you are practising. Arrange that variation before beginning the curl, instead of changing between versions partway through the ascent.
- 22
- Lower your spine progressively on the return, keeping your legs grounded and shoulders relaxed. Give the descent its own attention so the exercise ends with a deliberate arrival on the mat.
- 23
- Pause there to review the link you have rehearsed: lowering from the previous exercise, placing the arms overhead and establishing the Roll Up start. When you reconnect the movements, keep each of those actions recognizable even as the pauses become less prominent.
Set 3 of 6
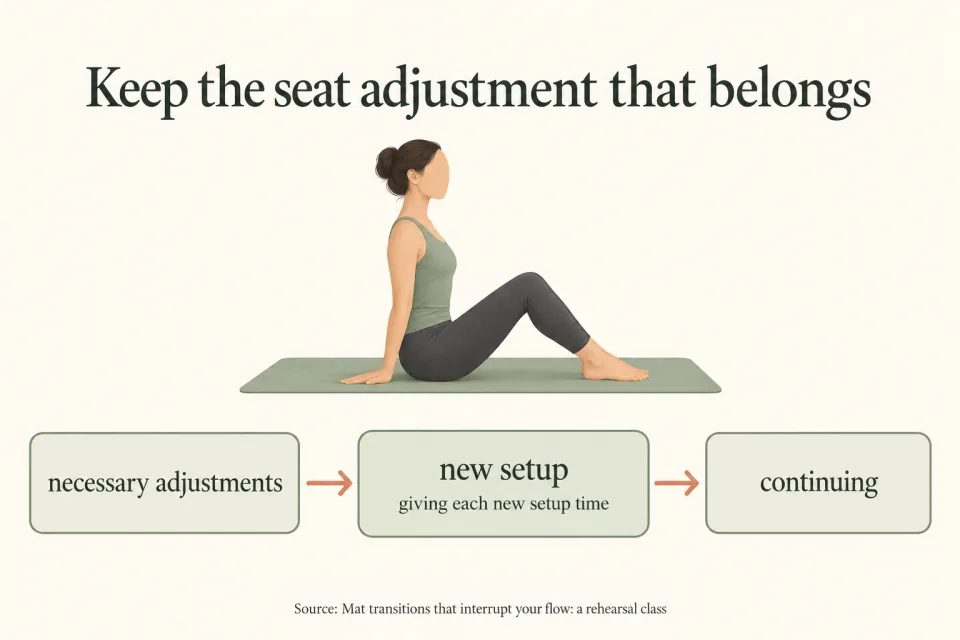
Keep the seat adjustment that belongs
- 24
- Rehearse the change from Rolling Like a Ball to Single Leg Stretch with the seat adjustment included. The advanced manual explicitly places a recentering of the seat before the roll down into the next exercise.
- 25
- Recenter your seat before leaving the seated finish. Make that adjustment while seated, rather than beginning the descent and then stopping to move yourself along the mat.
- 26
- Roll down while drawing a knee inward and extending the opposite leg. Keep your attention on arriving in the leg arrangement for Single Leg Stretch, with the necessary seat placement already completed.
- 27
- Hold the upper-body curve as you begin changing the arms and legs. The transition rehearsal ends at the starting shape; allow the alternating exercise to begin only after you have reached that shape.
- 28
- Keep your torso steady during the changes of leg position. Let the moving arms and legs belong to the exercise rather than using each change as an occasion to rearrange the whole body.
- 29
- Choose the higher extended-leg position if you are using that variation. Establish the height as part of your setup, so the extension has a chosen destination rather than a different landing point each time.
- 30
- Rest your head on the mat for the head-down variation of Single Leg Stretch. Give that choice its own settled starting position before continuing the arm and leg changes.
- 31
- For the advanced manual's transition into Double Leg Stretch, bring both knees inward while retaining the lifted head. Keep the shoulder-blade tips and tailbone grounded as you arrive in the next starting shape.
- 32
- Rehearse that arrival separately from the full exercise. Bring the knees inward and remain there long enough to recognize what changed: the leg arrangement has changed while the lifted upper-body position has continued.
- 33
- Keep the head-down variation separate in your rehearsal notes or mental review. The head-down option comes from the Single Leg Stretch instructions, whereas the retained lift belongs to the advanced manual's particular link into Double Leg Stretch.
- 34
- Repeat the link as practice of the transition, without adding the next exercise before its setup is established. On returning to the seated starting point for another rehearsal, include the recentering again if it is needed to reach the described position.
- 35
- Keep that seat movement in the sequence when you connect the exercises. The aim of this rehearsal is to remove an unnecessary detour, while preserving the adjustment that the transition actually calls for.
Set 4 of 6
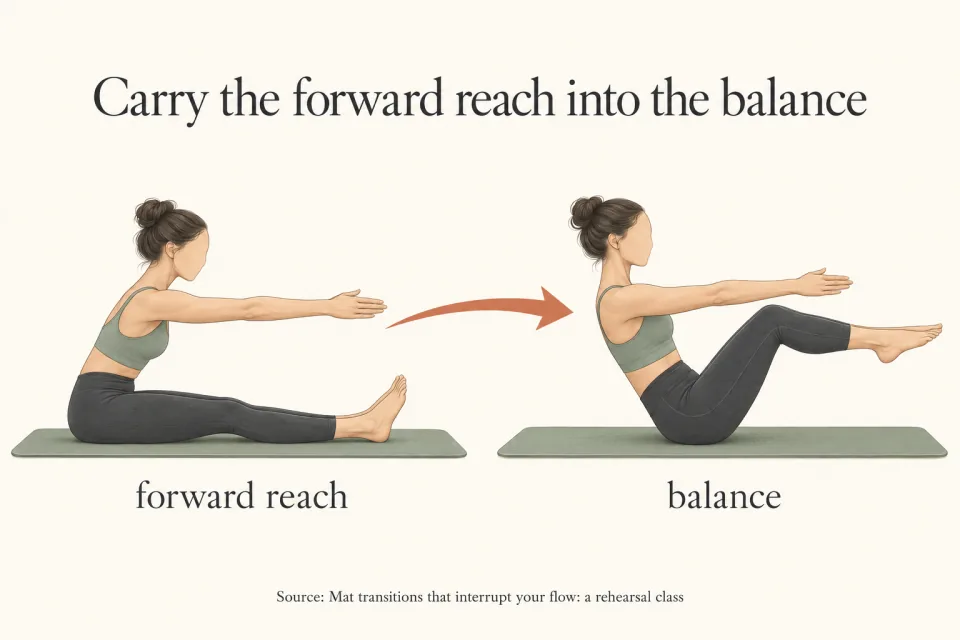
Carry the forward reach into the balance
- 36
- Start the transition from Spine Stretch to Open Leg Rocker by returning to sitting. Complete that return before leaning backward, so the change of direction follows a recognizable seated finish.
- 37
- Keep your arms reaching forward as you arrive. Leave them there for the next part of the link instead of lowering them and immediately lifting them back to the same position.
- 38
- Lean back slightly with the arms still forward. Rehearse this change on its own, stopping at the leaning position before adding the movement of the legs.
- 39
- Lift your legs into your hands. Let the hands receive the legs as the next part of the setup, keeping the earlier forward reach connected to the action that follows.
- 40
- Remain at the setup while you review how you arrived. For this rehearsal, reaching the Open Leg Rocker position is enough; adding the rocking action is a separate decision after the transition is complete.
- 41
- If you used the fingertips-on-the-floor variation of Spine Stretch, bring your arms forward for this link. That arm movement belongs in your transition because your preceding exercise ended with a different arm arrangement.
- 42
- If you used slightly bent knees in Spine Stretch, begin your rehearsal from that version. Keep the preparation you actually used in view rather than mentally substituting a different finish and then wondering why an adjustment is needed.
- 43
- Practise the forward-arm version again with attention on the moment you return to sitting. Keep the reach through that arrival so you can distinguish a continuous arm position from lowering and replacing the arms.
- 44
- Rehearse the slight backward lean without immediately lifting the legs. This pause separates the change in your seated position from the next action, allowing you to learn the order before connecting it.
- 45
- Then connect the return to sitting, the slight lean and the lift into the hands. Give each action enough room to be recognizable, with the arrival in the balance remaining the end of the rehearsal.
- 46
- Keep the rocking exercise outside this particular drill when you want to focus only on the transition. You can practise the route into its starting position without turning every arrival into another full exercise.
Set 5 of 6
Turn onto the front with a clear destination
- 47
- Rehearse the Saw-to-Swan-Dive transition by rolling onto your back. Start from the finish of Saw and make the move onto the back a distinct part of the route to the front of the body.
- 48
- Reach an arm overhead before turning onto your stomach. Let that reach belong to the turn, rather than arriving on your front and then returning to your back to arrange it.
- 49
- Turn onto your stomach to complete the link described in the advanced manual. Stop at that arrival for this rehearsal, leaving the full Swan-Dive exercise outside the drill.
- 50
- Practise the roll onto the back again with your destination already chosen. Keep the next arm reach in mind while completing the roll, so the turn has a planned continuation without needing to be hurried.
- 51
- Rehearse the overhead reach as its own action if the turn feels unclear as a sequence. Once you know where the arm goes, reconnect it with the turn onto the stomach.
- 52
- Leave out an added return to sitting when you practise this particular route. The supplied transition goes through the back to the stomach, so sitting up again would create another position between the named exercises.
- 53
- Keep the arrival on your stomach separate from launching into Swan-Dive. A transition rehearsal can finish at the next setup; continuity does not require you to add an exercise whose starting arrangement you are still examining.
- 54
- For a separate rehearsal, take the finishing position of Single Leg Kick and place your hands behind your back. This is the hand change described for the transition into Double Leg Kick.
- 55
- Place a side of your head on the mat. Let that placement complete the change into the next starting arrangement before adding any kicking movement.
- 56
- Rehearse the hand placement without first turning onto your back. In this link, the change happens while you remain on your front, unlike the earlier route from Saw.
- 57
- Connect the hand placement with the turn of the head, then pause in the resulting setup. Keep the next exercise separate until you have checked that the transition has brought you to the position you intended.
- 58
- Use the difference between these links when deciding what to leave out. Preserve the turn through the back in the Saw rehearsal, and preserve the change of hands and head in the kicking rehearsal, rather than imposing the same repositioning on every pair.
Set 6 of 6
Close by completing the descent
- 59
- Close the class with the return phase of the Roll Up, using the version you rehearsed earlier. Make the destination your finished position on the mat, without adding another exercise after the descent.
- 60
- If you are using the supported version, arrange your bent knees and hands behind them before lowering. Keep the chosen variation consistent through this closing rehearsal instead of changing the setup as you move.
- 61
- Lower your spine progressively toward the mat. Attend to the part of the descent you are performing rather than reaching ahead mentally to a movement that will not follow.
- 62
- Keep your legs grounded during the return. Leave their placement settled as the spine lowers, so the close has a clear finish rather than becoming another search for the next position.
- 63
- Let your shoulders remain relaxed as you arrive. Finish the lowering action before deciding whether to adjust your arms for the rest that follows.
- 64
- Take a deliberate rest on the mat. Use that pause as the planned end of this class, with no need to turn it into another transition rehearsal.
- 65
- Review the link that required the most rearranging, without performing it again immediately. Identify the last position of the previous exercise and the starting position of the next, then name the movement that connected them.
- 66
- Keep any required adjustment in that review. The seat recentering before Single Leg Stretch and the arm change after the fingertips-down Spine Stretch variation belong to their particular starting circumstances.
- 67
- Choose a small group to revisit during another practice, using the same arrival pause you used here. Begin by reaching the next setup clearly, then reconnect the exercises when their separate parts are familiar.
- 68
- Finish the review with the position you reached, rather than with a speed target. For this class, the useful question to carry into practice is whether each movement between exercises had a place in the route you intended.
Reading list
From the studio's plan file
- Plan credited to
- UniPilates, with no writer named
- What backs it
- 6 sources in the reading list