
Automated checks This plan went on the timetable after its content and sources passed the studio's automated checks on Thursday 29 October 2026. Before you start
From the studio's plan file
- Plan credited to
- UniPilates, with no writer named
- What backs it
- 9 sources in the reading list
Running order
Set 1 of 6
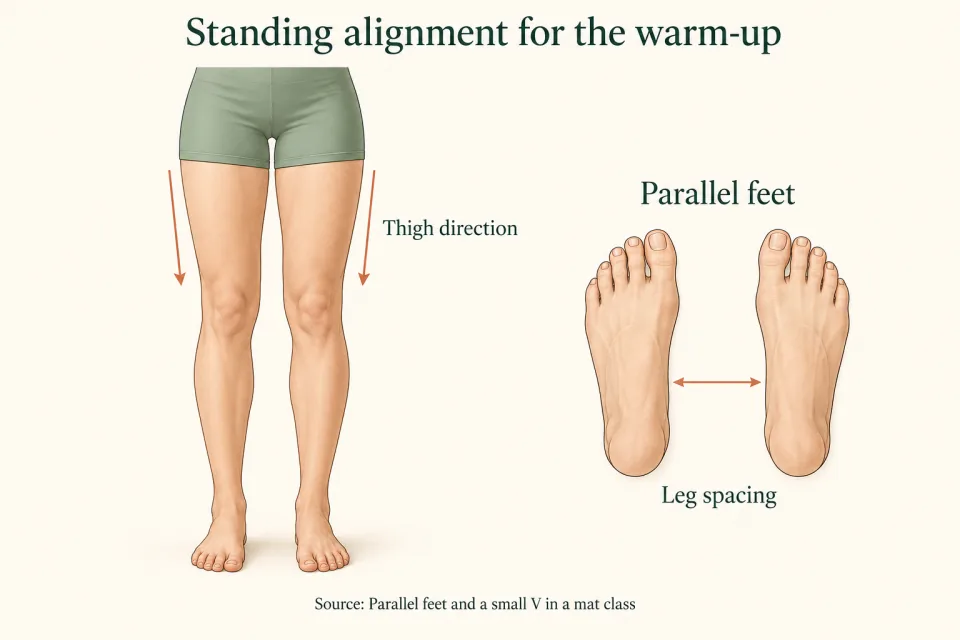
Standing alignment for the warm-up
- 01
- This class explores parallel legs and a small V through mat practice. Follow the direction of the thighs, the space between the legs and the movement at the ankles as separate parts of each setup.
- 02
- Stand with your feet beneath your hip joints. Find the spacing from those joints rather than from the outside edges of your hips, using the standing alignment described by Verywell Fit.
- 03
- Let your knees and feet face ahead, with your legs alongside each other. Look beyond the toes: check the direction of your knees before deciding that the whole leg is parallel.
- 04
- Picture a line descending from each hip joint through the knee and ankle into the foot. Follow that line along each leg separately, so your alignment check includes the joints above the feet.
- 05
- Keep a little softness in your knees. Let this be the standing position from which you explore the placement of your feet, with the knees short of a locked position.
- 06
- Shift your weight gently forward and back, then from side to side. Settle between those shifts and notice where you stand evenly over your feet.
- 07
- Bring your heels together and allow a small space between your toes. This is the small V called Pilates stance; use a modest opening rather than trying to make a wide shape.
- 08
- Begin the outward turn at your hips and let the legs follow. Keep your attention on the front of each thigh as you arrange the feet, rather than moving the toes outward as a separate finishing gesture.
- 09
- Choose the toe gap without trying to reproduce someone else's exact outline. Pilatay describes variation in that gap between people and does not require Pilates stance for every person or exercise.
- 10
- Return to parallel with your feet beneath the hip joints. Notice separately that you have changed the direction of the legs and the distance between the heels; carry those separate observations into the mat work.
Set 2 of 6
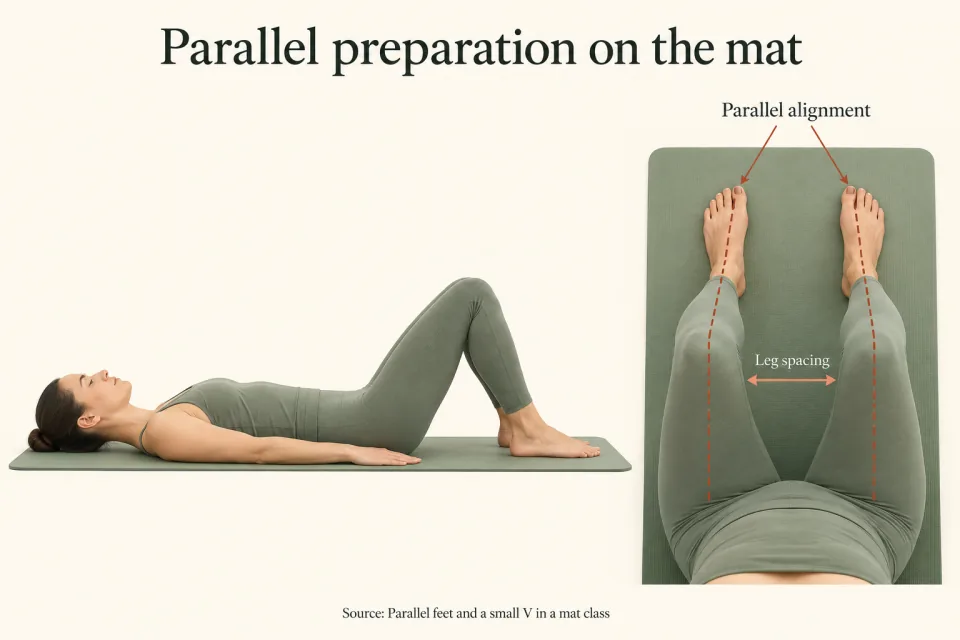
Parallel preparation on the mat
- 11
- Begin Shoulder Bridge preparation lying on your back, with bent knees, the soles of your feet on the mat and your arms beside your body. For this class, arrange the feet beneath the hip joints in parallel, applying the alignment check from standing to the mat setup.
- 12
- Follow the line from each hip through its knee toward the ankle and foot. Check the knees as well as the feet, keeping each leg arranged along its own line rather than using the toe direction as your only reference.
- 13
- Settle your pelvis with the front hip bones level with each other and with the pubic bone. Use those landmarks to find the neutral supine position described in the Pilates Anytime glossary before beginning the lift.
- 14
- Take a comfortable breath while keeping that starting shape. The Pilates Anytime glossary recommends comfortable breathing while learning unfamiliar exercises instead of holding the breath.
- 15
- Exhale as you lift your hips for Shoulder Bridge. Follow the University of Nevada, Reno Extension version here, allowing the lift to be the movement associated with the outgoing breath.
- 16
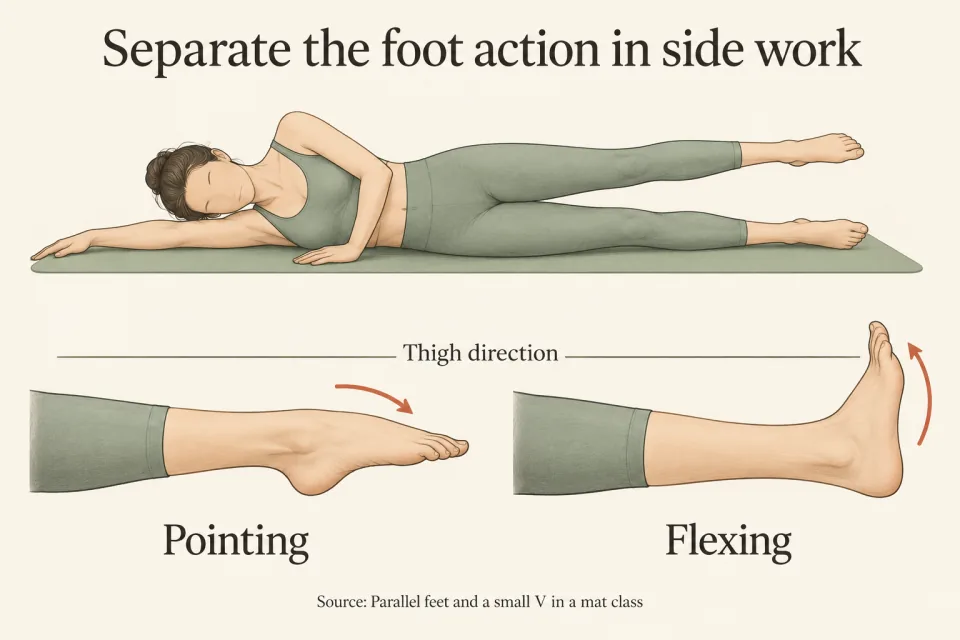
- Inhale as you lower your hips with control. Return to the mat with your knees bent and feet flat, so the end of the movement gives you the same clear leg arrangement to check again.
- 17
- Recheck the relationship between each knee and foot before continuing. If the knees have moved toward each other or spread apart, reset the starting alignment instead of changing only the position of the toes.
- 18
- Bring your legs into tabletop for the next preparation, placing the knees above the hips and the feet level with the knees. Keep the knees bent while you establish this shape on your back.
- 19
- Notice the new reference points for the legs. With the feet lifted, use the knees over the hips and the feet in line with the knees to organise the position, rather than looking for a standing footprint on the mat.
- 20
- Keep the tabletop shape while taking a comfortable breath. Let this preparation introduce the lifted-leg work that follows, with the direction of the legs already arranged before you add the arm movement.
Set 3 of 6
Lifted legs and the small V
- 21
- Start the Hundred with the tabletop leg position described in the University of Nevada, Reno Extension guide. Keep the bent legs and torso steady as you begin the arm pumps, giving the legs a fixed arrangement while the arms move.
- 22
- Pump the arms for five counts as you inhale and five counts as you exhale. Match the arm action to that breathing pattern while keeping the tabletop position unchanged.
- 23
- Continue to direct your attention to the knees over the hips. Let the arm movement happen without adding a repeated opening and closing of the legs to the exercise.
- 24
- For the intermediate version described by Women's Health, extend the straight legs approximately 45 degrees above the mat. Use this as a separate version of the exercise, setting the straight-leg position before returning your attention to the arm pumps.
- 25
- Arrange the lifted legs in a small Pilates stance, with the heels touching and the toes apart. Make the outward turn from the hips, following the front of each thigh as you establish the V in the air.
- 26
- Keep the heel contact while checking the direction of the thighs. The feet provide a visible meeting point, but your setup still includes the legs above them, just as it did when you were standing.
- 27
- Lengthen through the arches with the toes relaxed, following the foot cue in the Women's Health version. Let the toes continue the shape of the feet without curling them to make the point look stronger.
- 28
- Keep the leg orientation steady as the arms pump. If you are checking the V, look at the relationship between the thighs and heels rather than repeatedly adjusting the toe gap during the movement.
- 29
- Return your legs to the bent tabletop shape, then place your feet on the mat. Let the arm pumps finish before you arrange the extended-leg starting position for the circle work.
Set 4 of 6
Outward rotation within a leg circle
- 30
- Set up One Leg Circle on your back with your legs extended and feet flexed. Follow the Fit&Well example by placing your arms diagonally beside you and pressing them into the floor as you arrange the working leg.
- 31
- Turn the working thigh outward at the hip before extending the leg toward the ceiling. Establish that direction first, so the outward orientation is already present when you begin the circular pathway.
- 32
- Follow the front of the thigh as you make the turn. External hip rotation turns the front of the thigh away from the body's midline as the thigh bone rotates around its length.
- 33
- Use the centre of your body as the reference for the movement. In Pilates terminology, the midline is an imagined line running through the centre of the body from head to feet; picture it before taking the lifted leg across.
- 34
- Inhale as the working leg crosses the body. Keep your attention on the travelling leg while the hips and torso retain their position on the mat, as in the source's circle instructions.
- 35
- Exhale as the leg travels down and around. Follow that curved route back toward the starting position, keeping the movement of the leg distinct from the position of your trunk.
- 36
- Make the circle smaller if the larger pathway moves your hips or torso. In the Fit&Well instructions, the size of the circle changes to preserve the steady position of the body on the mat.
- 37
- Use a slightly softened working knee, or keep the working leg bent in tabletop, as the alternatives described in the same example. Arrange the chosen leg shape before tracing the pathway so that you can attend to the circle itself.
- 38
- Distinguish the circular route from the outward turn you established at the start. Circumduction traces a circle through bending, moving away from the midline, extending and moving toward the midline, whereas axial rotation turns the limb around its length.
- 39
- Settle the working leg back onto the mat and arrange the other side. Begin again with the foot position and thigh direction before adding the circle, keeping the setup and the travelling movement as separate cues.
Set 5 of 6
Separate the foot action in side work
- 40
- Begin Side Kick lying on your side, with your shoulders and hips along the back edge of the mat. Place your upper hand in front of your chest, following the setup described by Tom's Guide.
- 41
- Move your feet slightly forward until you can see your toes. Keep the shoulders and hips in their established line while the feet take this forward position, rather than moving the whole body toward the front of the mat.
- 42
- Flex the upper foot for the forward kick. Dorsiflexion brings the top of the foot toward the front of the lower leg at the ankle.
- 43
- Carry the upper leg forward with that flexed foot, keeping the torso still. Let the leg travel while the hand and the body's position on the mat give you familiar references for the setup.
- 44
- Point the foot for the backward sweep. Plantar flexion points the foot downward or raises the heel from the ground.
- 45
- Sweep the leg back with the foot pointed, keeping the torso steady. Follow the change at the ankle separately from the leg's forward and backward route, so that each part of the instruction has a clear place in the movement.
- 46
- For the up-and-down Side Kick variation, point the foot as you lift the upper leg. Keep the pelvis facing the same way as the leg rises, using the source's instruction to retain a steady pelvis throughout this variation.
- 47
- Flex the foot as you lower the leg. Allow the ankle action to change at the transition into the descent, then follow the lowering movement without rocking the pelvis.
- 48
- Observe the upper leg moving away from the body's midline during the lift and returning toward it during the lowering. Abduction moves a limb away from the midline, while adduction brings it toward or across that line.
- 49
- For the small-circle variation, hold the upper leg at hip height and trace small circles. Pause before changing direction, then circle the other way while keeping the position of the pelvis steady.
- 50
- Settle the upper leg, then turn over and arrange the other side. Rebuild the shoulders-and-hips line and move the feet into view before beginning, so the new side has its own deliberate setup.
Set 6 of 6
Parallel legs to close the class
- 51
- Use the leg arrangement from Neck Pull as a seated comparison to close the mat work. Pilatay describes this exercise with separated parallel legs and flexed feet; here, practise that arrangement without adding the rolling movement.
- 52
- Sit with your legs extended and separated, then turn your attention to the fronts of the knees. Arrange the legs alongside each other so that the direction of the thighs agrees with the parallel position of the feet.
- 53
- Flex the feet while keeping the leg orientation in place. Bring the tops of the feet toward the lower legs, attending to the ankle movement without adding an outward turn of the thighs.
- 54
- Look along each leg from the hip toward the knee, ankle and foot. Use the same continuous alignment check you used standing, now following it along the mat instead of down toward the floor.
- 55
- Notice the space between your heels in this setup. Leave that space present as you check the parallel direction, giving the separated legs their own arrangement rather than trying to reproduce the heel contact from the lifted small V.
- 56
- Take a comfortable breath in the seated position. Keep the legs arranged while your attention moves to the breath, letting this pause finish the mat portion of the class.
- 57
- Return to standing and place your feet beneath the hip joints. Recheck the knees and feet facing forward, with a little softness at the knees, before exploring the small V again.
- 58
- Bring the heels together and turn outward from the hips to form the small V. Follow the thighs as the feet change direction, using the visible toe gap as part of the position rather than the entire instruction.
- 59
- Finish in parallel with the feet beneath the hip joints. Make gentle weight shifts forward, backward and sideways, then settle into an even standing position with the knees softly bent.
Reading list
- Basic Leg and Hip Alignment for Posture and Exercise
- Demystifying Classical Pilates: What Is The Deal With Pilates Stance?
- To V or not to V
- Pilates Glossary of Terms
- 9.5 Types of Body Movements
- How To Do The Pilates Hundred With Perfect Form So You Actually Feel Your Core
- A Pilates instructor says this is the one exercise she recommends to people who want to build core strength and improve their hip mobility
- A Pilates teacher says you can fire up your abs and glutes with this 'essential' exercise for beginners
- Pilates Palooza