
Automated checks This plan went on the timetable after its content and sources passed the studio's automated checks on Monday 9 November 2026. Before you start
From the studio's plan file
- Plan credited to
- UniPilates, with no writer named
- What backs it
- 11 sources in the reading list
Running order
Set 1 of 6
Warm up with supported head placement
- 01
- Use this class to explore lengthening as a direction, while keeping the shape and steady points of each exercise. This is an editorial class sequence assembled from teaching examples, including roller variations, rather than a fixed classical order.
- 02
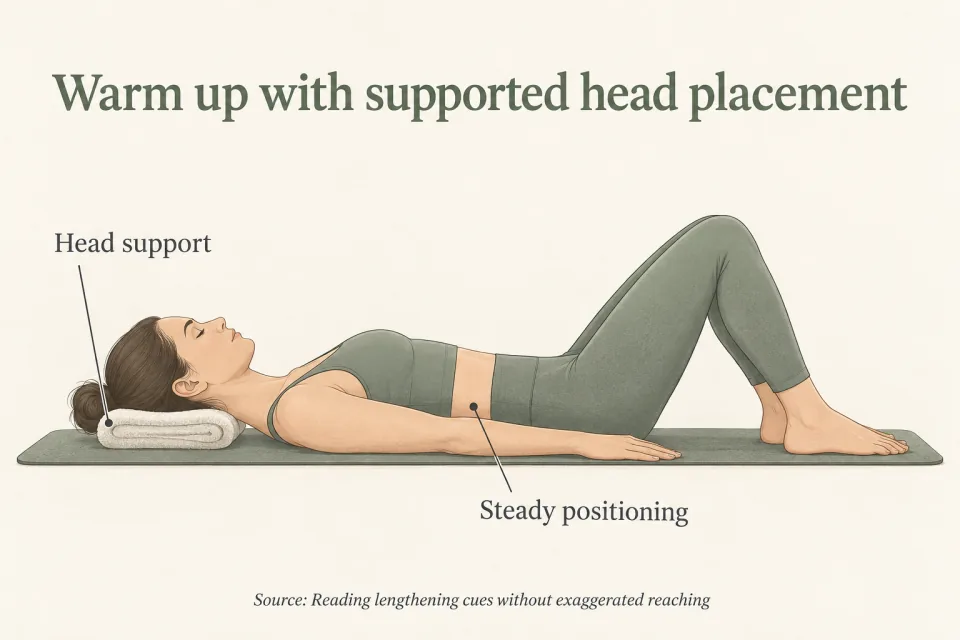
- Begin with the head placement used for Chest Lift, lying on your back. Interlace your fingers behind your head, or nest your palms beneath it, so your hands hold the back of your head rather than touch its sides. Keep this preparation focused on how you place and support your head.
- 03
- Direct your elbows slightly forward as you settle into that support. Leave them there while you attend to your head position, rather than opening them into a wide T shape. This follows the positioning described by Mara Sievers and gives you a specific arrangement to use when a general instruction such as lengthen feels unclear.
- 04
- For the Chest Lift movement, think of the back of your neck continuing away from your upper back while keeping space between your chin and chest. Helen O’Leary’s example distinguishes this placement from pulling the head forward to gain height. Use that distinction to guide the movement, without making extra height the task.
- 05
- Check the position visually if the wording leaves you uncertain. Suzy Levi recommends using a mirror, photograph or video to compare the position you sense with the position you can see. Look specifically at the relationship between your head and chest, rather than judging the whole exercise from the image.
- 06
- Choose the detail you will attend to before moving again. Fairbairn advises choosing one correction for an exercise, or sometimes leaving it alone, instead of correcting everything at once. For this preparation, that might mean attending to the space beneath your chin while leaving your elbow position as you already arranged it.
- 07
- Match your chosen cue to the part of the movement it describes. Eve Fairbairn recommends checking familiar cues against the movement being observed. Carry that approach into the class: translate lengthen into a particular direction, then identify the position that accompanies it.
Set 2 of 6
Reach away on hands and knees
- 08
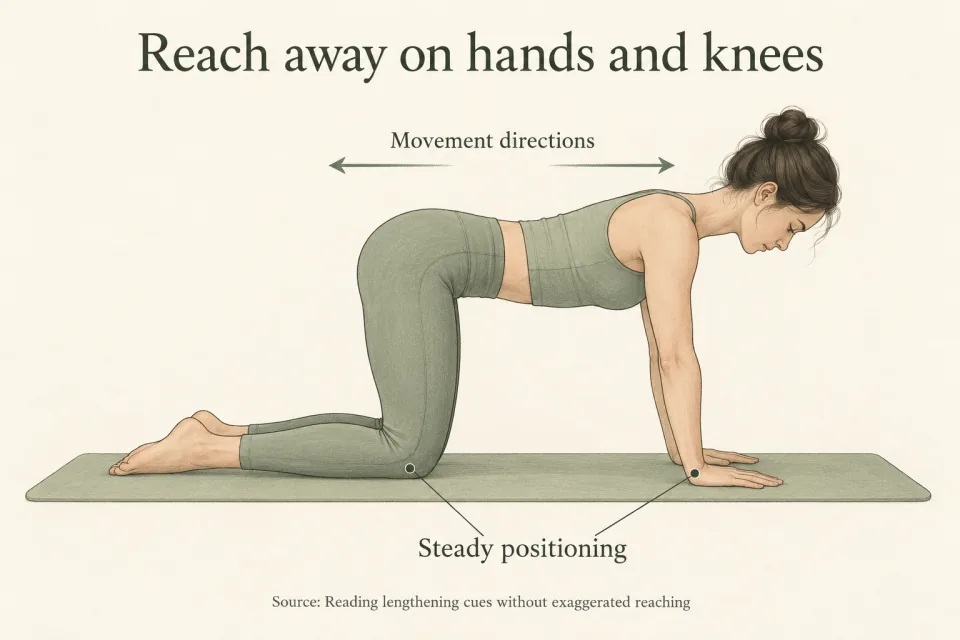
- Use Masaryk University’s kneeling Swimming variation to practise reaching in opposite directions while keeping the pelvis still. Its starting position places the hands on a roller, with the head following the line of the back. Keep that supported setup when following the sequence described here.
- 09
- Arrange your head as a continuation of your spine before sending a limb away. Give the lengthening instruction a clear meaning at this stage: follow the line already established by your back. Keep your attention on that relationship rather than searching for a separate, exaggerated position for your head.
- 10
- Exhale as you extend your right arm and left leg away from the centre of your body. Follow their opposite directions through the reach. The instruction is to send the limbs away while retaining the exercise’s starting organisation; the distance travelled is only part of what you are observing.
- 11
- Keep the lower back steady and the pelvis motionless during that outward movement, with the abdomen drawn in. Read these as accompanying instructions for the reach. If extending farther changes the position of your pelvis, bring the limb reach back to the point where you can carry out the instructions together.
- 12
- Compare the moving limbs with the still pelvis as a positioning exercise. Picture an attempt in which the hand travels farther but the pelvis turns with it. In that example, use the pelvic movement as your signal to adjust the reach, rather than counting the extra hand travel as completion of the cue.
- 13
- Inhale as the arm and leg return, allowing the return to have its own clear direction. Bring them back from their extended positions before changing sides. Then use the same outward instruction for the opposite arm and leg, keeping your attention on the relationship between their movement and the pelvis.
- 14
- If the image of reaching away is too broad, replace it with the explicit movement instruction: extend the arm and opposite leg while keeping the lower back and pelvis steady. The Pilates Association Australia distinguishes detailed instructions from broader movement images. Use whichever wording makes this particular action clear to you.
Set 3 of 6
Round forward without losing the seated position
- 15
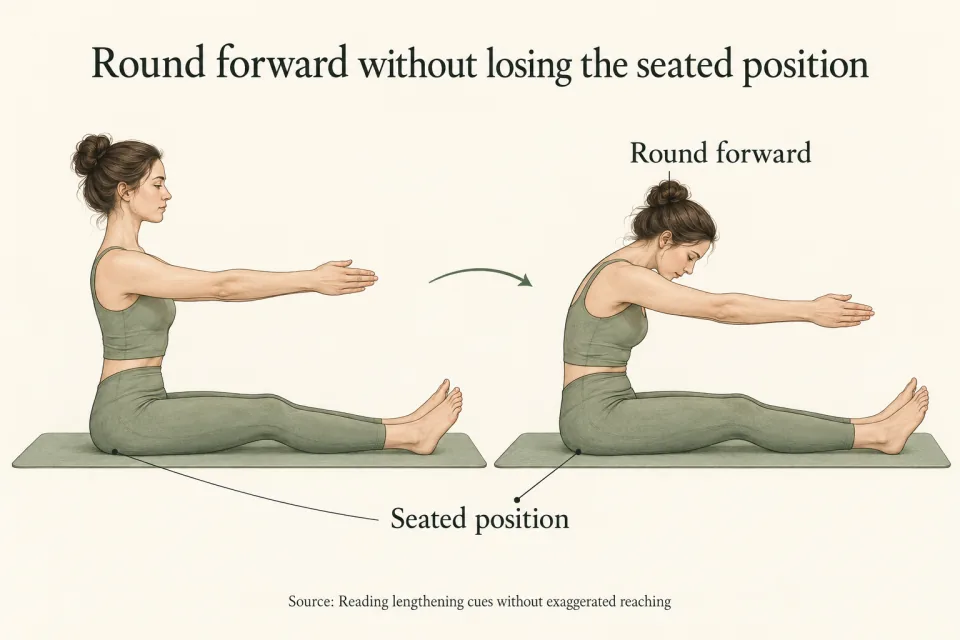
- Practise Spine Stretch with an upward intention followed by sequential rounding forward. In Masaryk University’s variation, sit on a roller with flexed feet, arms directed toward the feet, and the spine and pelvis in their neutral starting position. Retain that setup for the breathing sequence that follows.
- 16
- Inhale to lengthen from your seated position. Treat this as the preparation for the forward movement, keeping your attention on the upward direction. You are about to change the shape of your spine, so there is no need to interpret the preparation as an instruction to hold that starting shape throughout.
- 17
- Exhale and roll forward progressively through the spine. Let the movement unfold in sequence rather than sending the hands ahead of an otherwise unchanged trunk. The arms remain directed toward the feet, but use the movement of the spine as the main task during this part of the exercise.
- 18
- Imagine travelling upward and over a large ball as you round. Follow the curved pathway suggested by the image, carrying the forward movement over its imagined surface. Give the ball only that role: it describes the route of the movement and does not supply a distance that your hands must cover.
- 19
- Keep the pelvis from slumping as the forward movement continues. If you notice that reaching farther with your hands changes the seated position, return your attention to the pelvis and revise the reach. Work with the forward movement and the pelvic instruction together, rather than completing them as separate tasks.
- 20
- Use the contrast between rounding and slumping to read the cue more precisely. In this exercise, allow the spine to round as instructed while retaining the pelvic position. A literal attempt to stay straight throughout would leave out the forward spinal movement that this version of Spine Stretch asks you to perform.
- 21
- Inhale to roll upright again, following the return through the spine. Let the arms accompany that return rather than using their position as your destination. Finish in the seated starting arrangement, ready to change the direction of the next exercise without carrying the forward-rounding instruction into every movement.
Set 4 of 6
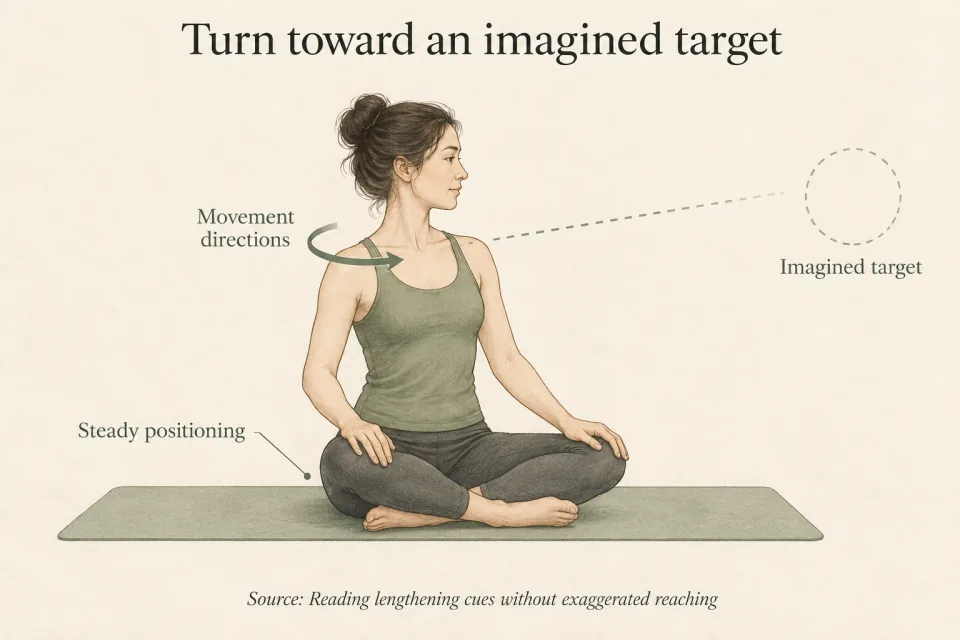
Turn toward an imagined target
- 22
- Use Saw to distinguish a diagonal direction from a destination you must touch. Begin with Masaryk University’s roller variation: sit on the support with your legs wider than your shoulders and your arms reaching sideways. Establish that seated arrangement before adding the turn.
- 23
- Inhale before the twist and forward inclination described in this version. Allow the turn to establish the diagonal pathway, then direct the little finger toward the opposite little toe. Read toward as the instruction for the reach, keeping the relationship between the hand and opposite foot clear.
- 24
- Retain the spinal curve during the diagonal movement, and keep the pelvis motionless. Follow the hand with your attention only as far as you can also follow those positioning instructions. The exercise description pairs the reach with a still pelvis, so keep them together when deciding the extent of the movement.
- 25
- Use an imagined comparison to check your interpretation. Suppose the little finger comes closer to the opposite foot only after the pelvis shifts. Adjust that attempt by keeping the pelvis in place and accepting the hand position that accompanies it, rather than continuing to pursue the foot as a required endpoint.
- 26
- For a separate positioning rehearsal, place your hands on your pelvis while making the seated turn. Use their contact to check whether the pelvis moves with the trunk, following Suzy Levi’s self-touch approach. Then restore the sideways arm position for Saw and carry that same attention into the diagonal reach.
- 27
- If the turn itself is unclear, rehearse it with your hands resting on the rib cage. Attend to the position beneath your hands and to your breathing, as in Levi’s rib-cage feedback example. Return the arms to the exercise position before following the finger-to-toe direction again.
- 28
- Choose between a body instruction and an image according to the detail you are practising. Keep the pelvis still names the position directly; send the little finger toward the opposite little toe gives the reach a direction. Use the direct instruction to check the movement described by the image, without turning the image into an extra task.
Set 5 of 6
Lift with the head following the spine
- 29
- Practise Swan with a long spinal line during the upward movement. Use Masaryk University’s roller-supported variation, beginning face down with the arms extended onto the roller, the legs resting long on the floor and the pelvis neutral. Arrange the support before beginning the lift.
- 30
- Inhale as you move gently upward. Keep the lengthening intention present during that movement, rather than completing a reach and then abandoning it to lift. Here, the upward action belongs to Swan, while the instruction to maintain spinal length accompanies the action throughout.
- 31
- Let your head follow the line of your spine as you rise. Keep checking that relationship instead of choosing a head position independently of the rest of the movement. The university’s precision cue connects head placement with the lengthened spine, giving you something more specific to follow than simply looking higher.
- 32
- Compare this use of length with the pathway in Spine Stretch. There, you followed a forward curve over an imagined ball; here, follow the upward movement of Swan. Carry the directional intention into the new exercise while allowing its movement to differ from the seated rounding you practised earlier.
- 33
- Reconsider a habitual shoulder instruction if it has become the main task during the arm position. Mara Sievers cautions against applying the instruction to keep the shoulders away from the ears throughout every overhead arm movement. Use that teaching point to examine the wording you are following, rather than automatically adding a downward shoulder action.
- 34
- If you need different wording for the arm position, try Sievers’s image of widening across the middle back. Attend to that area while maintaining the exercise’s specified spinal line. Keep the image tied to this positioning task, rather than turning widening into a demand for the largest possible movement.
- 35
- Exhale as you return smoothly from the lift. Let the head continue to follow the spine during the descent, just as it did during the rise. Settle back into the face-down starting arrangement, allowing the return to complete the movement rather than ending your attention at its highest point.
Set 6 of 6
Close with a controlled leg reach
- 36
- Finish the moving part of the class with the supported Double Leg Stretch variation described by Masaryk University. Begin with your back on a roller, your bent legs raised and your arms resting alongside your body. Keep this supported arrangement distinct from other versions of the exercise.
- 37
- Inhale as you extend the legs away. Choose the height of the extension according to whether your pelvis remains still, as the guide specifies. Give the reach a clear direction while letting the pelvic instruction determine the position in which you perform it.
- 38
- Observe the pelvis as the legs extend, rather than looking only at how far the feet travel. If a farther-reaching attempt changes the pelvic position, adjust the extension height and repeat the movement with that detail in mind. Use the position you can observe to interpret the general instruction to lengthen.
- 39
- Work through a comparison without deliberately exaggerating the reach. Picture an attempt in which the legs extend while the pelvis stays still, followed by an attempt in which the feet travel farther and the pelvis moves. Choose the arrangement that follows the guide’s pelvic instruction, even though the feet finish elsewhere.
- 40
- Exhale as you bring the knees back toward your chest. Follow the returning movement with the same attention you gave the extension, allowing the knees to come back from the reach. Keep this breathing pattern attached to the supported variation being practised here rather than applying it automatically to every Double Leg Stretch sequence.
- 41
- For a final position check, finish the supported exercise and return to lying on the mat with your head resting down. Revisit the head placement from the opening preparation without adding a Chest Lift. Attend to the space between your chin and chest, leaving the movement itself finished.
- 42
- Let the closing cue be specific to that resting position. If an image no longer describes the action you are doing, set it aside rather than continuing to reach because the word lengthen remains in mind. Julia Wyncoll describes imagery as a teaching tool whose usefulness varies between people and sessions; choose the wording that fits the position you are checking now.
Reading list
- Cueing is Your Superpower
- Is there a ‘right’ way to cue?
- Tactile Cueing in Pilates: Three Touchless Strategies to Achieve Similar Outcomes
- Why Use Directed Imagery?
- Forget That Cue! – Three Wrong Cues for the Shoulder Girdle
- 13 - Spine Stretch
- 14 - Saw
- 15 - Swan
- 11 - Double Leg Stretch
- 19 - Swimming
- A Pilates instructor says these are the five moves beginners usually get wrong and explains how to do them properly